


|
Quantity
|
Out of stock
|
||
|
|
|||
|
|
|||
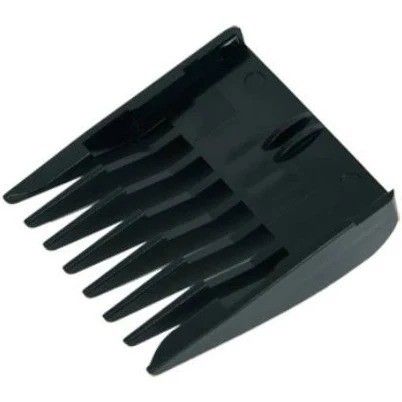
9 mm attachment for Rowenta trimmer (CS-00139028)
The 9 mm attachment for Rowenta trimmer (CS-00139028) is an essential replacement part designed for various Rowenta trimmer models. This attachment provides an even and neat cut, making it ideal for trimming hair on the head and beard. Use this attachment to achieve the desired hair length and achieve professional results at home.
Specifications and compatibility
| Feature | Value |
|---|---|
| Attachment type | 9 mm |
| Part number | CS-00139028 |
| Compatible models | JT1603F0/GU0 (HAIR TRIMMER DRIVER 2), TN1600F0/GU0 (HAIR TRIMMER DRIVER 2), TN1603F0/GU0 (HAIR TRIMMER DRIVER), TN1604F0/GU0 (HAIR TRIMMER DRIVER), TN1606F0/GU0 (HAIR TRIMMER DRIVER 2), TN1607F0/GU0 (HAIR TRIMMER DRIVER SILVER MOSAIC), TN1608F0/GU0 (HAIR TRIMMER DRIVER JUNGLE), TN1700D8/GU0 (HAIR TRIMMER LOGIC) |
How to choose the right attachment
When selecting an attachment for your Rowenta trimmer, consider the following points:
- Ensure that the part number (CS-00139028) matches your trimmer.
- Check compatibility with your trimmer model to avoid mismatches.
- Choose an attachment with the desired cutting length (in this case, 9 mm) to achieve the desired result.
Possible causes of failure and prevention methods
Some reasons why you may need to replace the attachment include:
- Wear from regular use: attachments can lose their sharpness and shape.
- Damage: the attachment may be damaged due to improper use or dropping.
To prevent premature wear of the attachment, it is recommended to:
- Regularly clean the attachment after use to remove hair and dirt.
- Store the trimmer in a dry place, protected from mechanical damage.
- Avoid applying excessive pressure on the attachment during trimming.
Difficulty of part replacement
Replacing the 9 mm attachment on the Rowenta trimmer is a simple process that can be performed by any user. Follow these steps:
- Turn off the trimmer and disconnect it from the power supply.
- Remove the old attachment by pulling it down.
- Install the new attachment by pressing it into place until it clicks.
- Ensure that the attachment is securely attached, and turn on the trimmer to check.
The difficulty of replacing the attachment is rated at 1 out of 5, making it accessible for users without repair experience.